
This guide shows how to make the FreeAstroAPI WordPress starter kit work on a real WordPress site.
The starter kit is the Astrology Suite for FreeAstroAPI WordPress plugin. It adds Gutenberg blocks and shortcodes for natal charts, reports, simple sign tools, and ephemeris tables.
Install it from the official WordPress plugin page:
Astrology Suite for FreeAstroAPI on WordPress.org
1. Install and activate the plugin
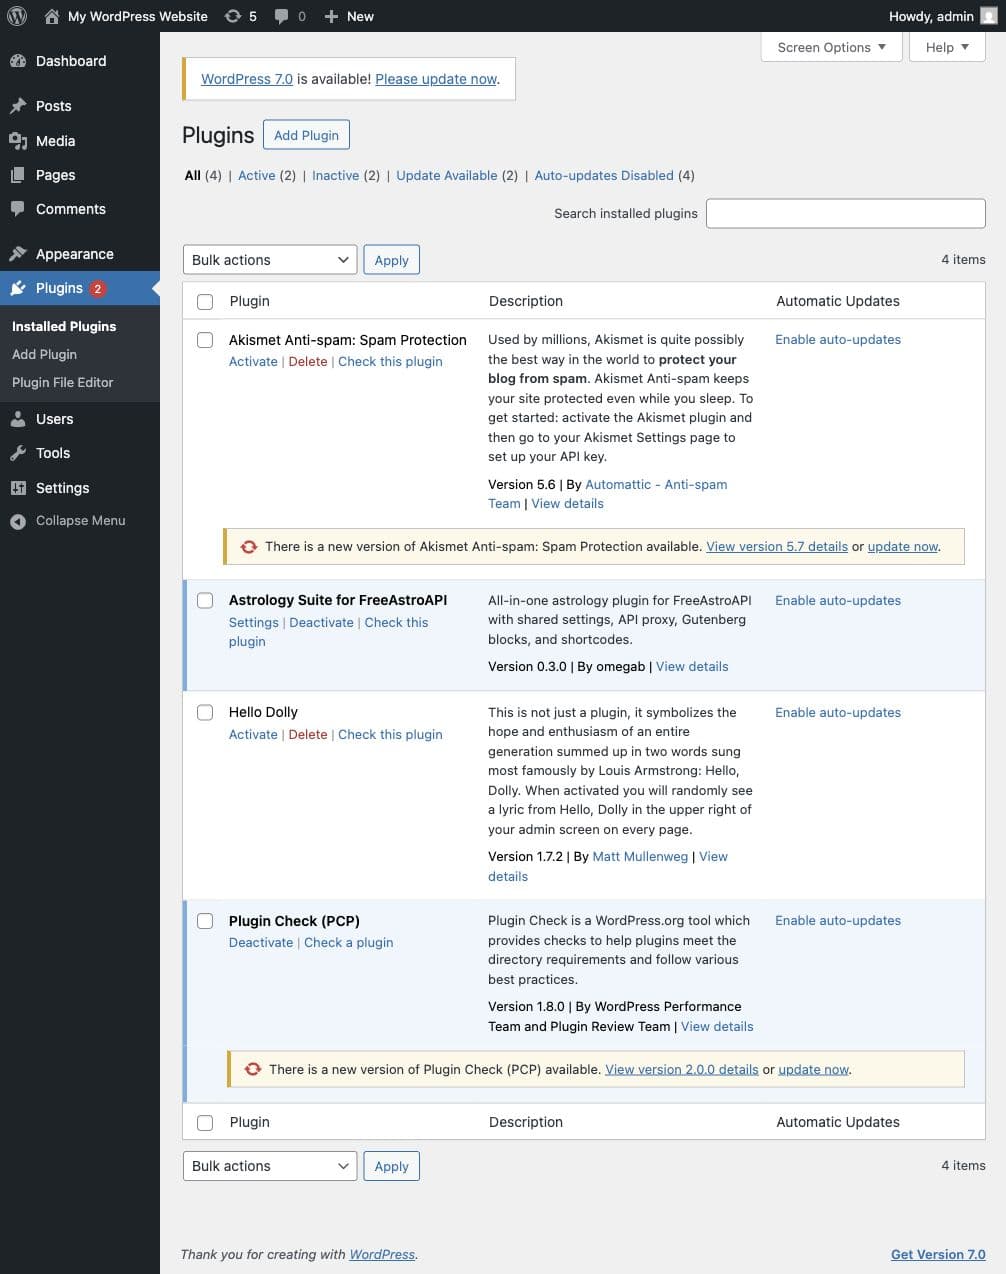
In WordPress, open Plugins > Add New Plugin and search for:
Astrology Suite for FreeAstroAPIInstall the plugin, then click Activate.
You can also download it from the WordPress.org plugin page and upload the ZIP manually:
Download the plugin from WordPress.org
After activation, WordPress adds a settings page at:
Settings > Astrology SuiteThe plugin also registers Astrology Suite blocks in the WordPress block editor.
2. Create a FreeAstroAPI key
The plugin needs a FreeAstroAPI key before it can calculate charts or reports.
Create a free account:
Then open your dashboard:
Open the FreeAstroAPI dashboard
Go to API Keys, create a key, and copy it immediately. The full key is shown only once.
Keep the key private. Do not paste it into public pages, screenshots, GitHub issues, or frontend JavaScript.
3. Save the API key in WordPress
In WordPress, open:
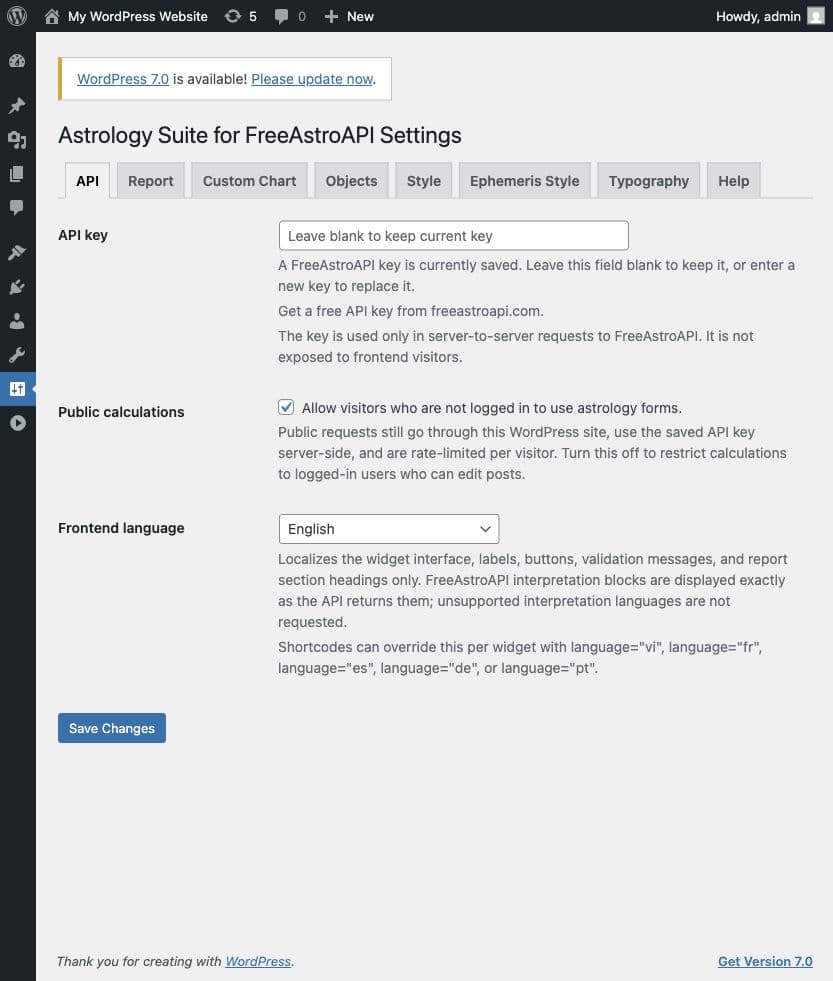
Settings > Astrology Suite > APIPaste your FreeAstroAPI key into the API key field and click Save Changes.
Important: after a key is saved, the API key field may appear blank. This is expected. Leave it blank to keep the saved key, or paste a new key if you want to replace it.
The plugin sends API requests from WordPress. Visitors do not receive the raw API key in their browser.
4. Allow visitors to use the tools
Still in Settings > Astrology Suite > API, check the public access setting.
Enable Allow public calculations if visitors should be able to use chart, report, simple sign, and ephemeris forms without logging in.
If this is disabled, public visitors will see an access message instead of the form. This is useful for private membership sites, but most public astrology tools should keep public calculations enabled.
5. Choose the frontend language
The Frontend language option controls plugin interface text such as form labels, button text, loading messages, and status messages.
Choose the language you want visitors to see, then click Save Changes.
The language setting controls the plugin interface. Interpretation text depends on what FreeAstroAPI returns for the selected endpoint and options.
6. Start with a chart and report block
Open the WordPress page where you want the astrology tool to appear.
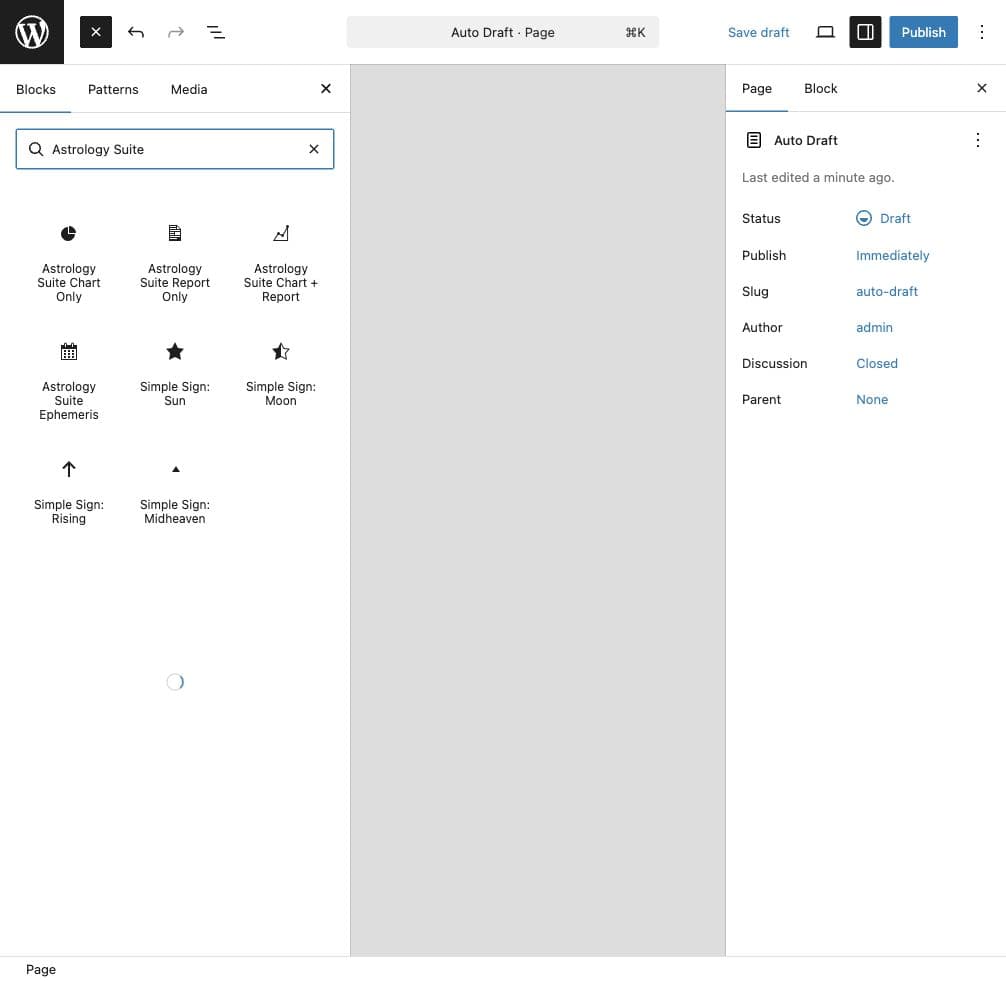
In the block editor, click the + inserter and search for:
Astrology SuiteFor the first public page, use:
Astrology Suite Chart + ReportThis gives visitors one form and shows both the natal chart and the interpretation report.
Other available blocks include:
- Astrology Suite Chart Only
- Astrology Suite Report Only
- Astrology Suite Ephemeris
- Simple Sign: Sun
- Simple Sign: Moon
- Simple Sign: Rising
- Simple Sign: Midheaven
Publish or update the page after adding the block.
7. Test the public page
Open the page on the frontend, not only inside the editor preview.
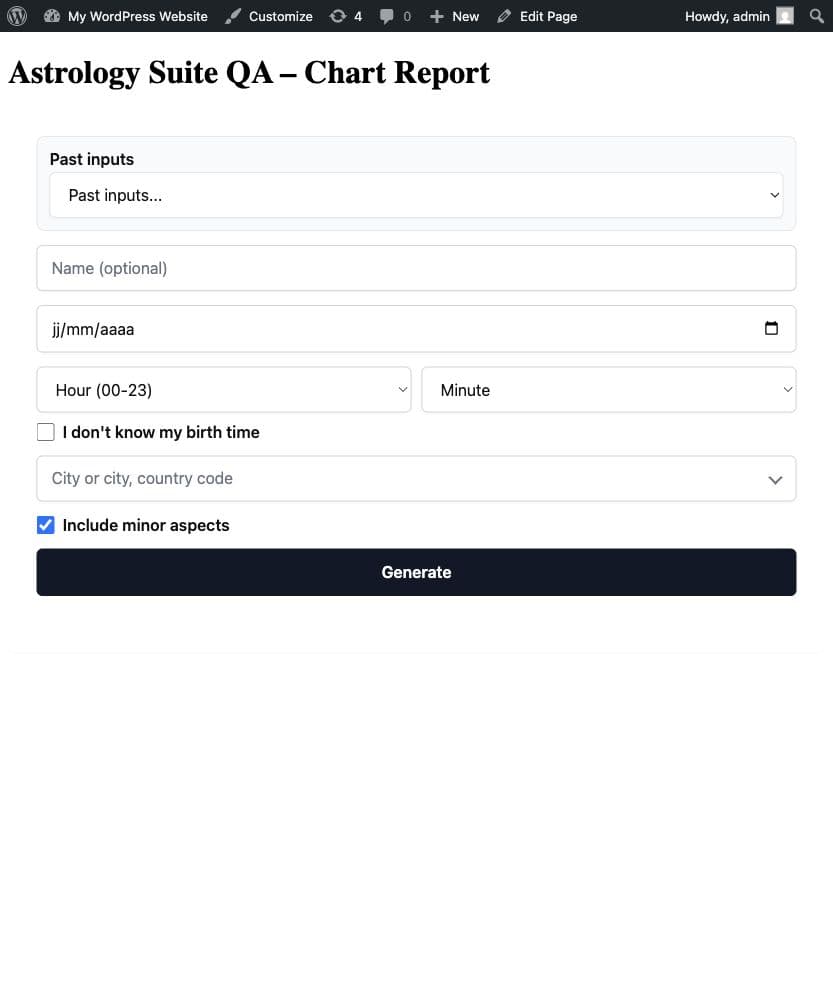
For natal chart and report blocks, submit a real test profile with:
- Name
- Birth date
- Birth hour and minute
- Birth city
The city field searches after the visitor types at least two characters. Select a city suggestion from the dropdown so the plugin can use the correct timezone, latitude, and longitude.
If a visitor does not know the birth time, they can select I do not know my birth time. The plugin sends the request with unknown birth time handling, and time-dependent details are omitted when they cannot be calculated safely.
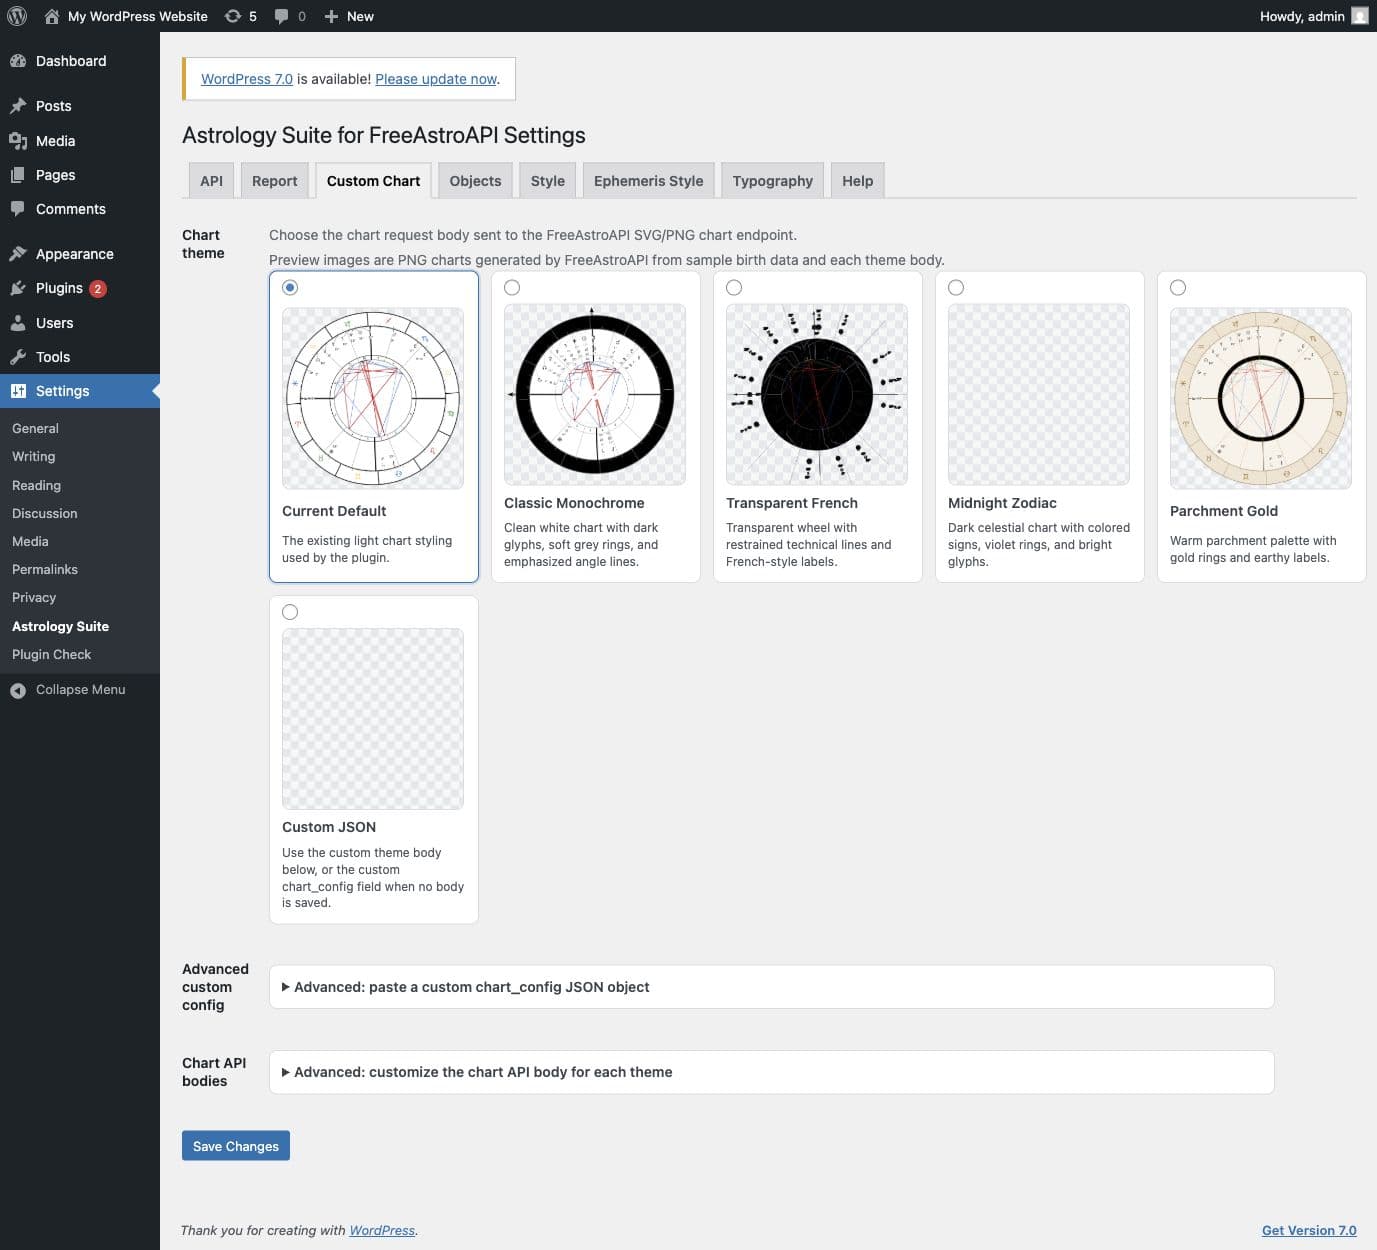
8. Pick a chart style
Open:
Settings > Astrology Suite > Custom ChartChoose a preset chart theme and save changes. Then reload the public page and submit another test request.
Recommended beginner flow:
- Pick a preset chart theme.
- Save the settings.
- Test the public page.
- Only use advanced custom chart JSON after the basic setup works.
If you want to design a custom chart style later, use the FreeAstroAPI Chart Designer:
9. Configure report length and sections
Open:
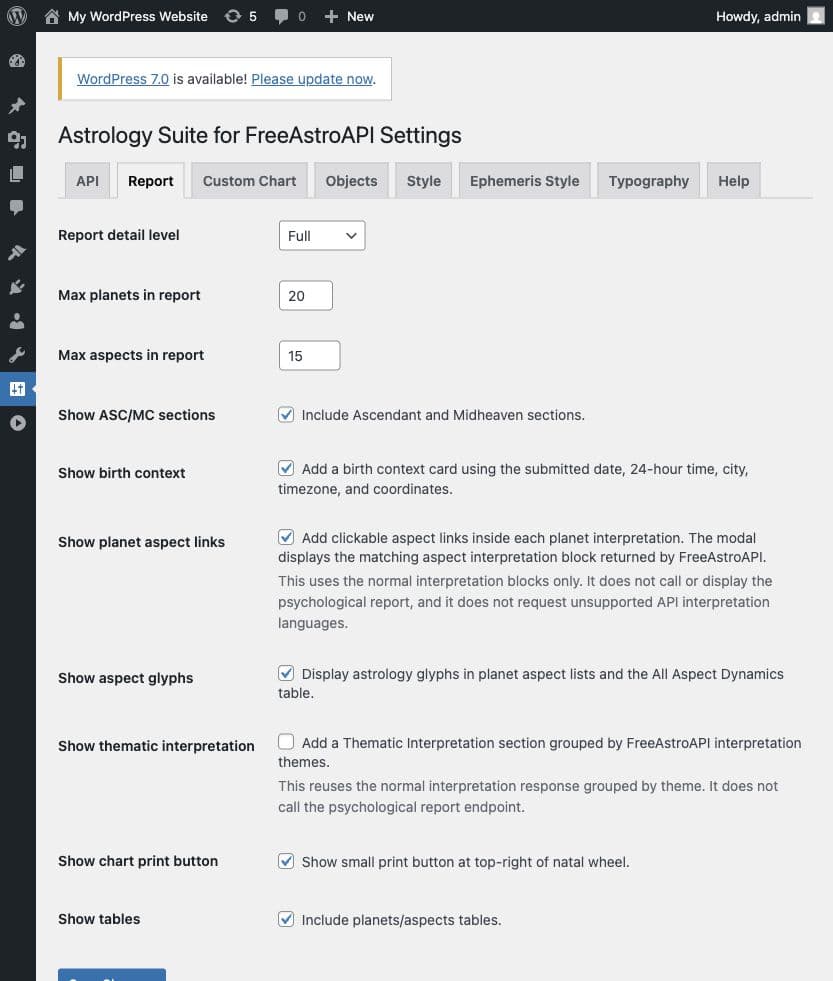
Settings > Astrology Suite > ReportUse this tab to control how much report content visitors see.
Useful beginner settings include:
- Report detail level
- Maximum planets shown
- Maximum aspects shown per section
- Whether ASC and MC sections are included
- Whether birth context is shown
- Whether tables are shown
- Whether chart print controls are visible
- Whether planet aspect links are shown
- Whether the thematic interpretation section is shown
Start with the defaults. If the page feels too long, reduce the report limits later.
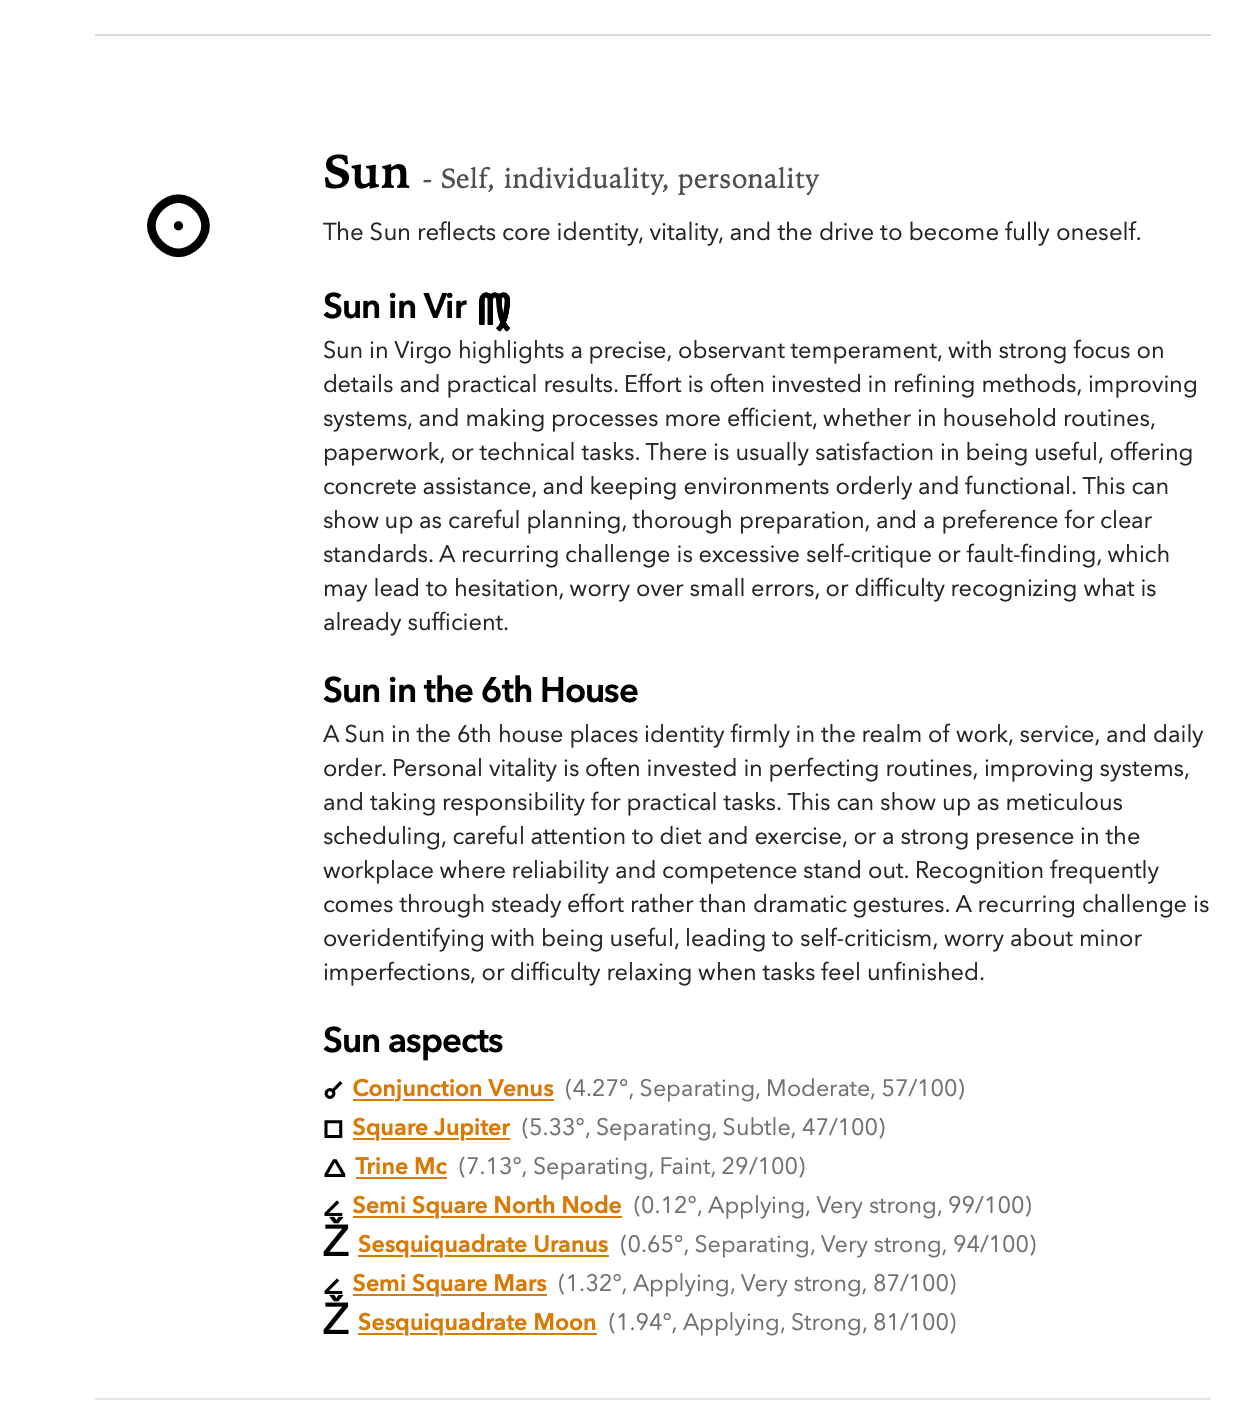
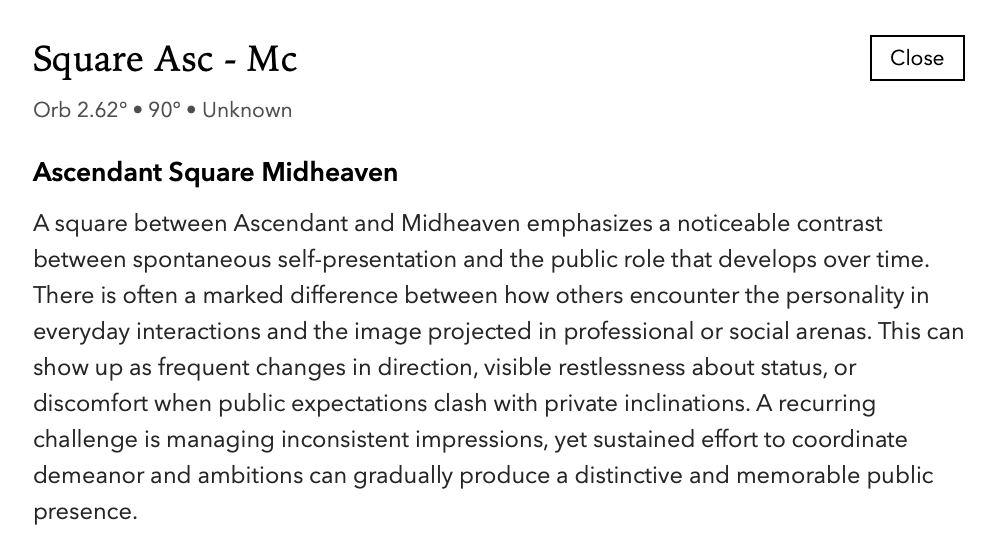
If Show planet aspect links is enabled, planet sections can show related aspect links. Visitors can click an aspect to open the interpretation modal when FreeAstroAPI returns matching interpretation text.
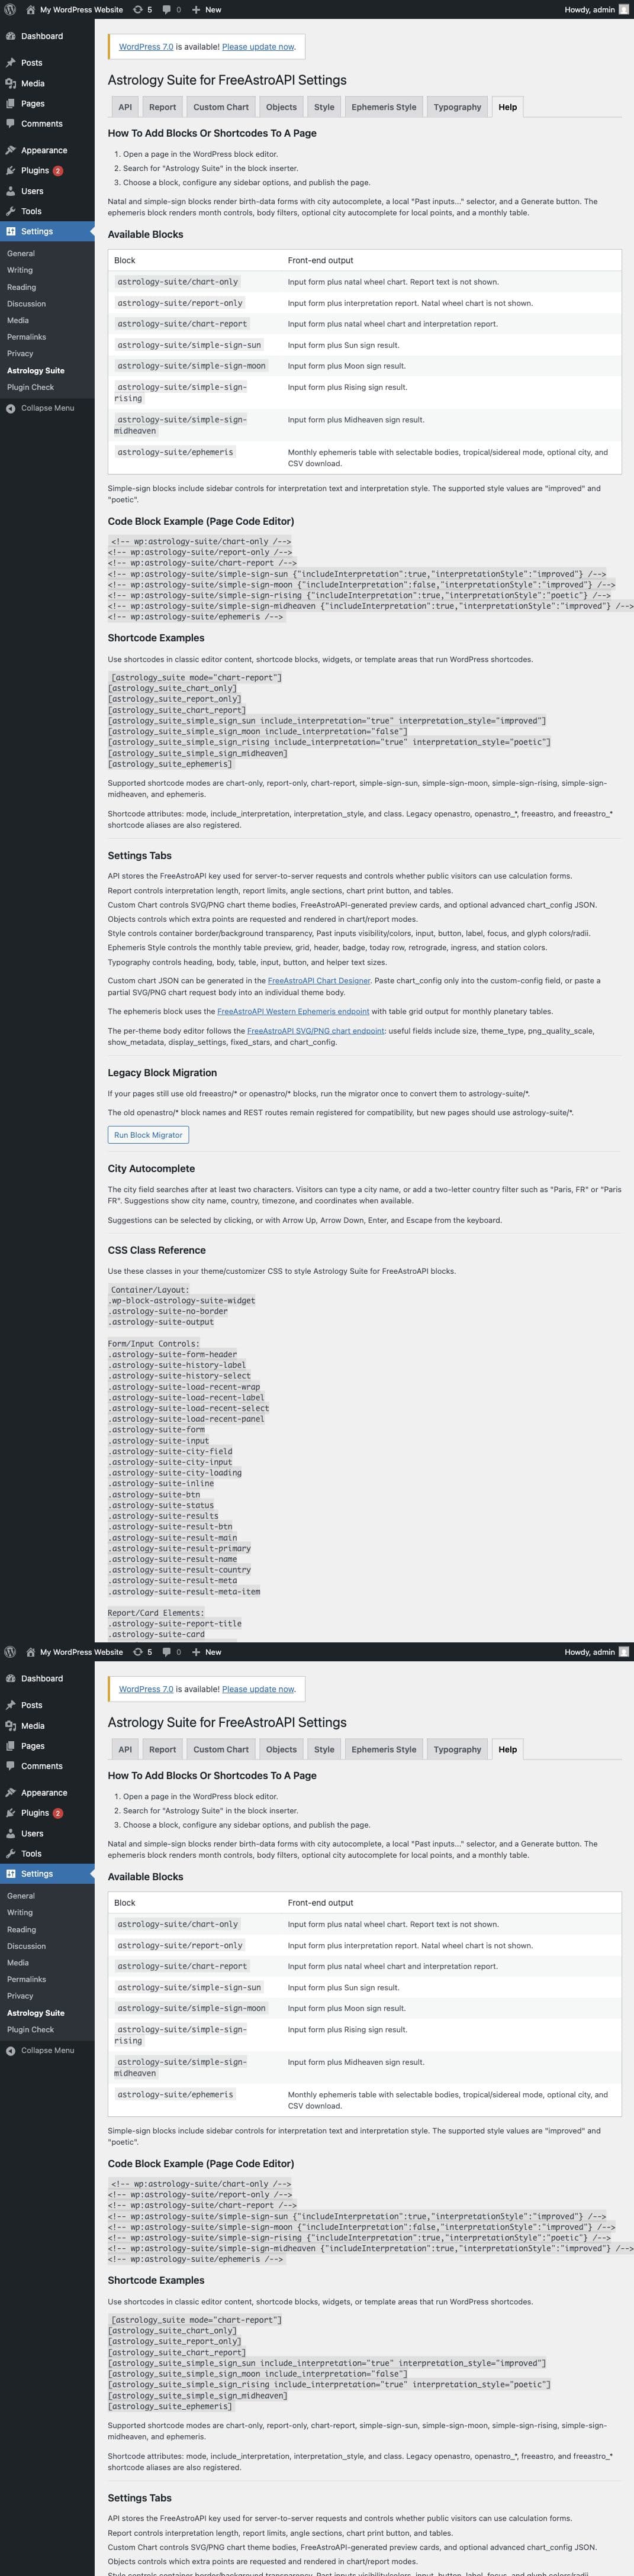
10. Use shortcodes when blocks are not enough
If your theme, classic editor, widget area, or page builder works better with shortcodes, use the plugin shortcodes instead of blocks.
Common examples:
[astrology_suite mode="chart-report"]
[astrology_suite mode="chart-only"]
[astrology_suite mode="report-only"]
[astrology_suite_chart_only]
[astrology_suite_report_only]
[astrology_suite_chart_report]
[astrology_suite_simple_sign_sun include_interpretation="true"]
[astrology_suite_simple_sign_moon]
[astrology_suite_simple_sign_rising]
[astrology_suite_simple_sign_midheaven]
[astrology_suite_ephemeris]
Use shortcodes when:
- You are using the classic editor.
- A page builder has better shortcode support than Gutenberg block support.
- You want to place a tool inside a shortcode-ready widget or template area.
11. Style the widgets
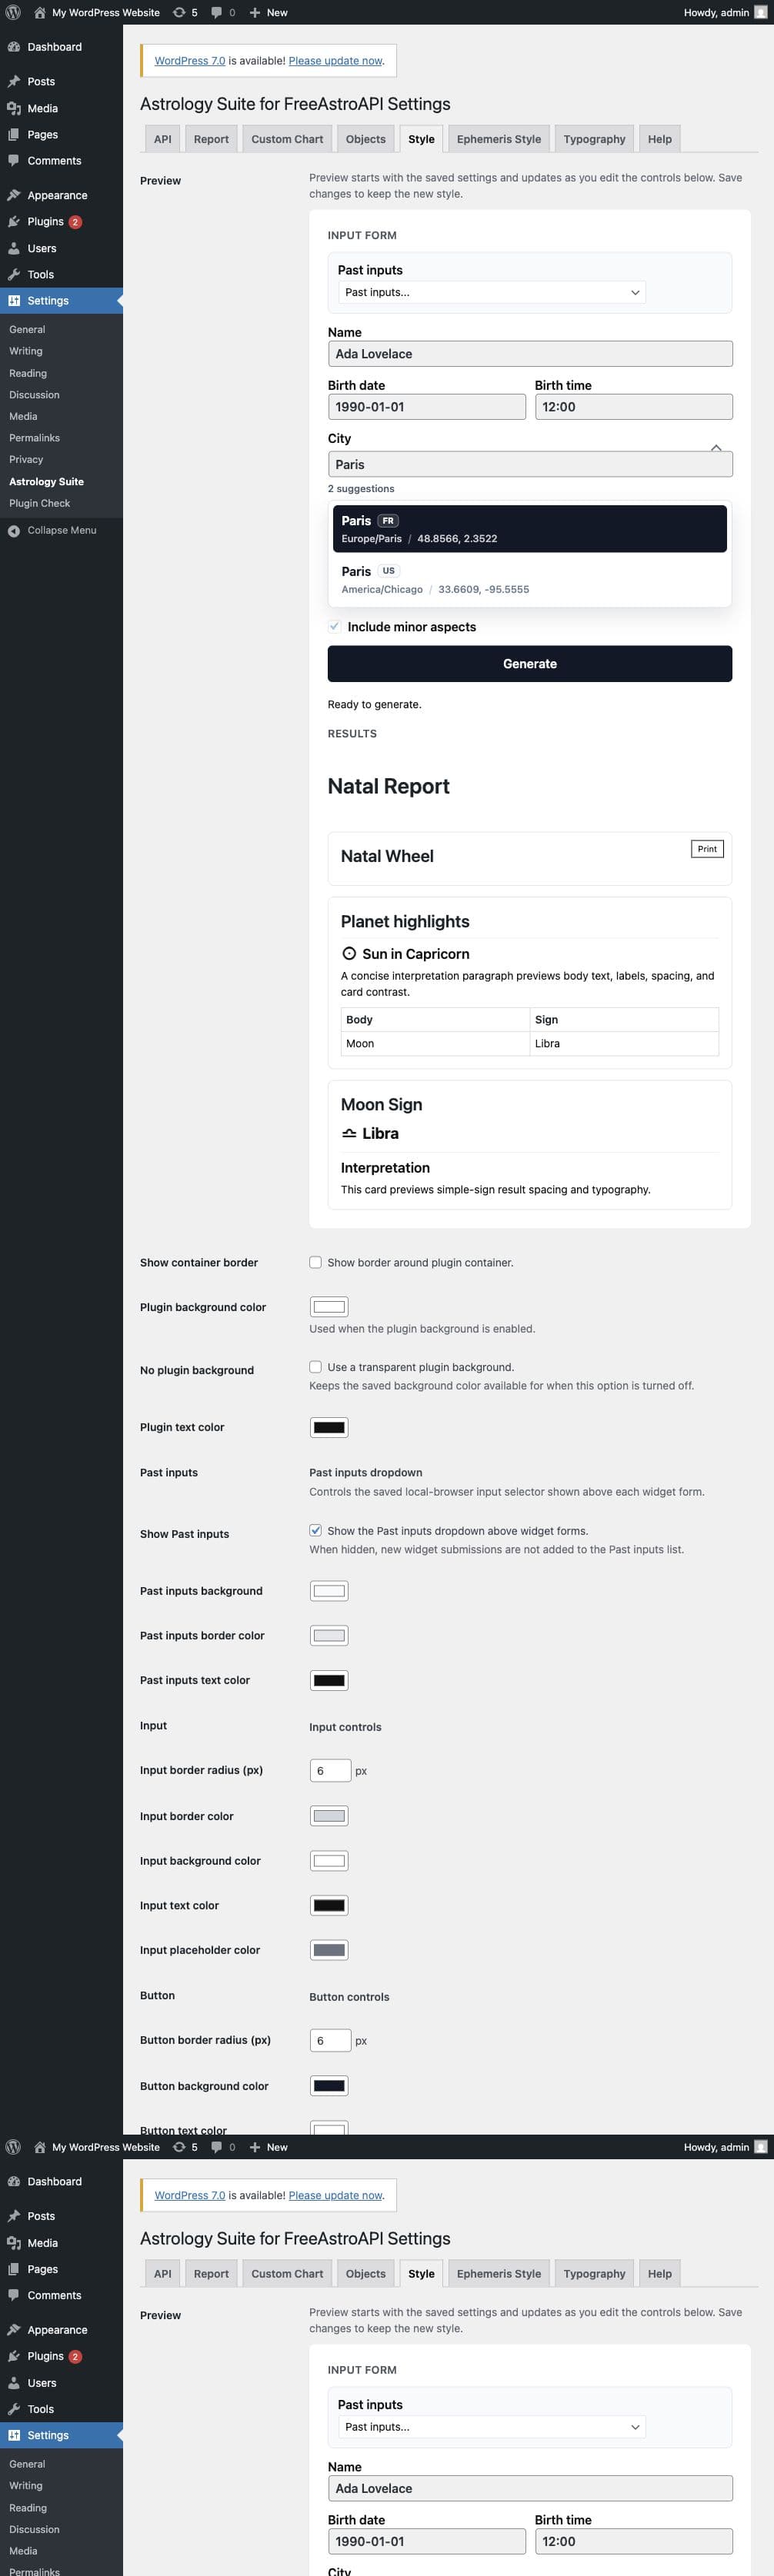
Open:
Settings > Astrology Suite > StyleUse this tab to adjust the main widget appearance:
- Wrapper background
- Border visibility
- Form inputs
- Labels
- Buttons
- Focus states
- Result cards
- Past input controls
- Aspect interpretation modal colors
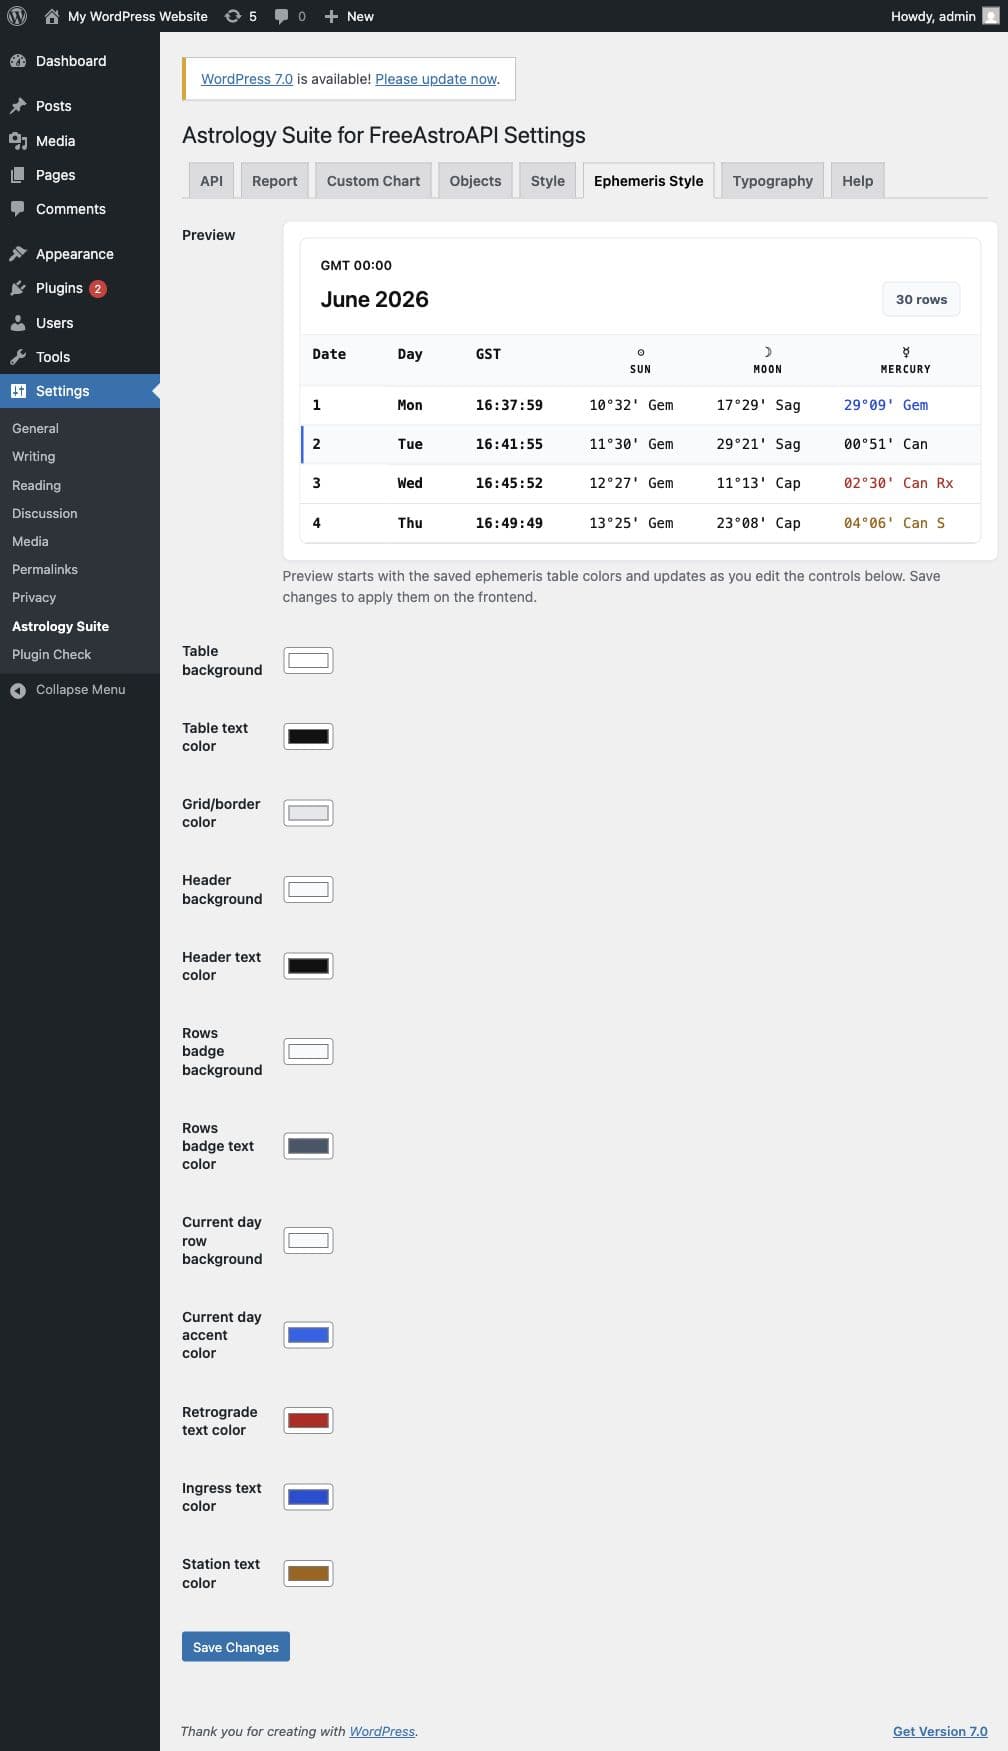
For the ephemeris table, use the separate tab:
Settings > Astrology Suite > Ephemeris StyleThat tab controls table background, text, grid lines, header colors, current day styling, retrograde values, ingress values, and station values.
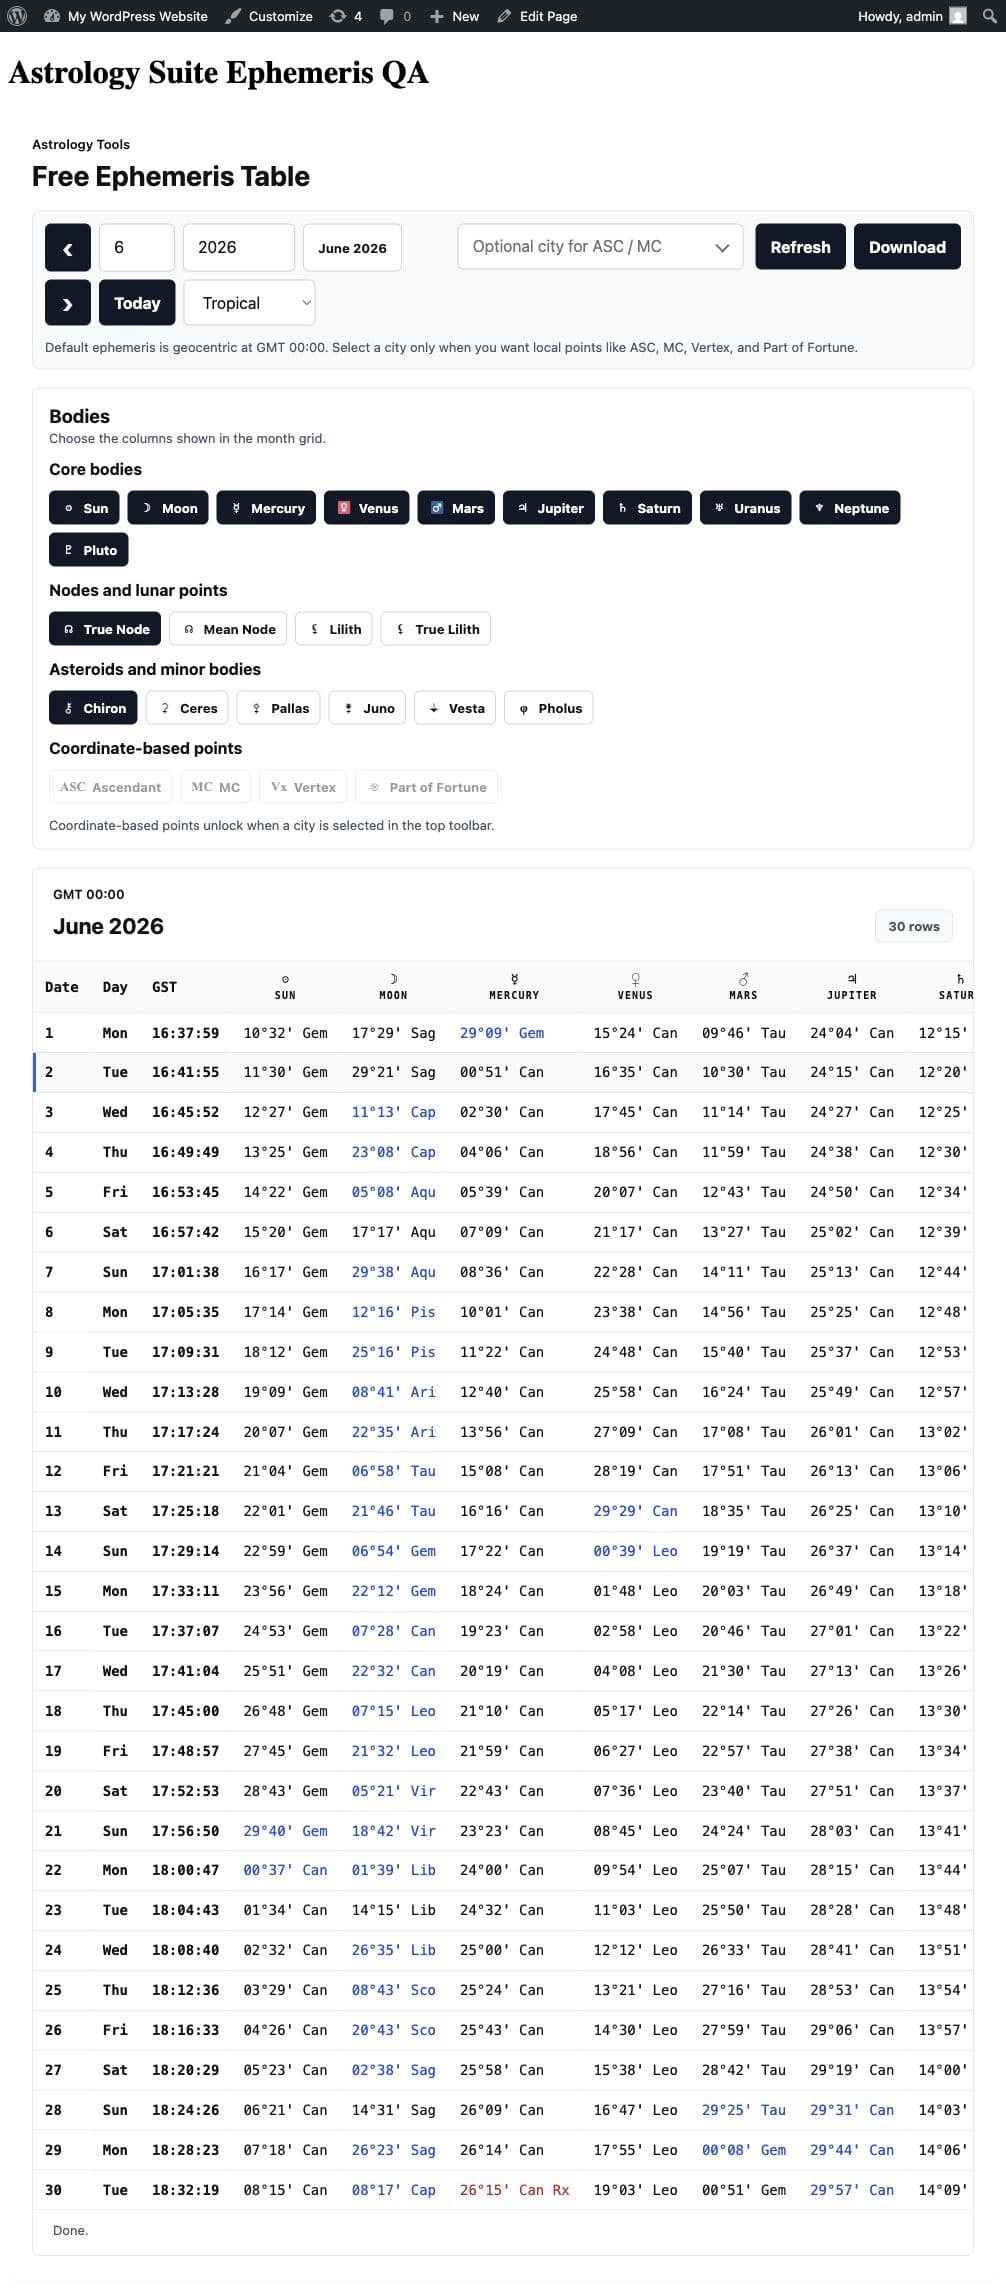
On the frontend, the ephemeris block lets visitors switch month, year, zodiac mode, selected bodies, and CSV export options.
12. Add a privacy note
Astrology Suite sends calculation requests to FreeAstroAPI over HTTPS when a visitor submits a form.
Depending on the block, request data can include:
- Birth date and time
- Unknown birth time preference
- City, timezone, latitude, and longitude
- Selected chart and report options
- Selected astrology points
- Selected ephemeris month, year, zodiac mode, and bodies
The plugin does not store visitor birth data in WordPress by default. The optional past inputs list is stored in the visitor browser local storage.
Add a short privacy note near your astrology tool or in your site privacy policy so visitors understand how calculations are processed.
13. Troubleshoot common setup problems
The form says visitors do not have access
Open Settings > Astrology Suite > API and enable public calculations. If you want a private tool, log in as a WordPress user with editor permissions.
The API key field is blank after saving
This is expected. Leave the field blank to keep the saved key, or paste a new key to replace it.
City suggestions do not appear
Check that the visitor typed at least two characters, the API key is saved, and the site can reach FreeAstroAPI.
Try a more specific query, such as:
Paris, FRThe chart does not render
Check that:
- The API key is valid.
- The birth form uses a selected city suggestion.
- The Custom Chart tab does not contain invalid custom JSON.
- The browser console or WordPress error log does not show an API error.
The report is missing houses, ASC, or MC
These details depend on birth time. If the visitor marked the birth time as unknown, the plugin omits time-dependent details instead of showing unsafe placeholders.
Styling changes do not show
Check that:
- You saved the correct settings tab.
- Your page cache is cleared.
- Your theme CSS is not overriding the plugin styles.
- You are editing Style for normal widgets and Ephemeris Style for ephemeris tables.
14. Launch checklist
Before sharing the page publicly:
- Install and activate the plugin.
- Save a valid FreeAstroAPI key.
- Enable public calculations if the page is public.
- Choose the frontend language.
- Add a chart, report, simple sign, or ephemeris block.
- Submit one real test request.
- Confirm city autocomplete works.
- Test the unknown birth time option.
- Confirm the chart or report output looks correct on desktop.
- Test the page on mobile.
- Add a privacy note.
- Clear your WordPress cache.
Once these checks pass, your WordPress astrology starter kit is ready for visitors.